Ancient
A jungle temple complex of tight corridors and layered chokepoints. Ancient rewards map control, utility efficiency, and patient defaults over raw aggression.
Radar de la carte
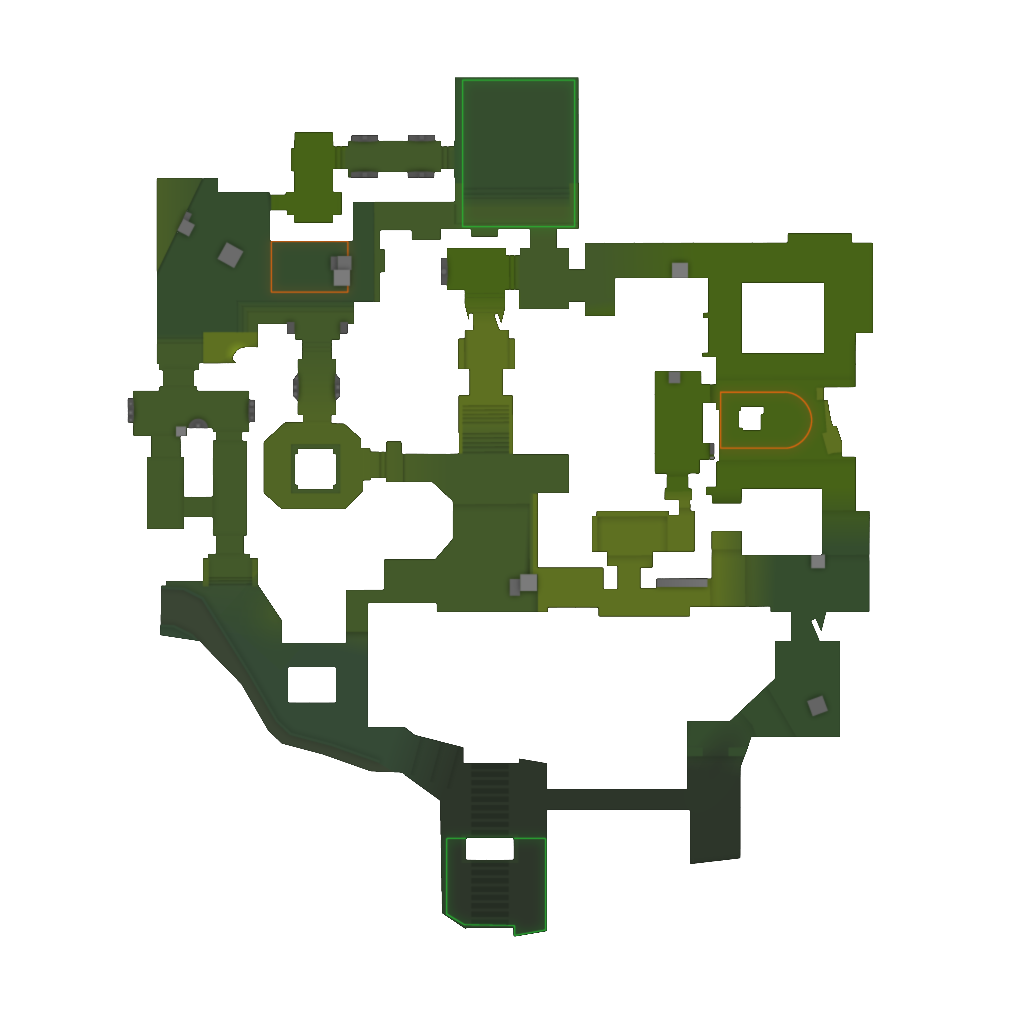 AlleyA SiteB SiteCT SpawnHouseMain HallMidOutsideRampRuinsSide EntranceSide HallT Side LowerT Side UpperT SpawnTop of MidTunnelsWater
Statistiques du jeu professionnel
Tous les callouts (39 positions)
Côté CT (16)
Snipers Nest
The double-door position giving CTs a commanding view over mid.
A Site
The A bombsite between CT Lane, Short, and the box cluster, entered from Main and Short.
Boost
The elevated spot right of Long when entering A — a common off-angle hold.
Big Box
The large crate beside the A site — standard entry cover and plant protection.
Single
The narrow crate next to Plat by the A site.
Plat
The raised corner platform beside A site overlooking the plant zone.
Triple Box
The three stacked boxes at the back of A site — a strong anchor and retake cover spot.
Donut
The circular room beside A site linking toward CT — cleared or smoked on every A hit.
CT Lane
The lane connecting CT spawn to A site — the rotation route smoked during A executes.
Temple
The passage from CT spawn to A site providing the long-range hold onto Main.
CT Spawn
Counter-Terrorist spawn at the north, feeding A through Temple/CT Lane and B through Alley and Back Halls.
B Site
The B bombsite between Ramp, House, and Square, anchored around its central Pillar.
Pillar
The stone-and-timber pillar on B site — the site's central cover for anchors and post-plants.
Square
The large square structure between Back Halls and the B site.
Back Halls
The corridor connecting Alley to Square behind the B site.
Alley
The CT-side lane from spawn toward Back Halls and B.
Côté T (12)
T Spawn
Terrorist spawn at the south of the map, splitting toward Split/Elbow, A Halls, and the Ramp lane.
Split
The junction connecting T spawn to Elbow and the Stairs toward A Halls.
Stairs
The steps linking Split to A Halls on the way to A Main.
A Halls
The corridor between Stairs and A Main — the T staging area for A hits.
Doors
The double doors from Ruins into T Lower — the swing point between the mid and B lanes.
Ruins
The broken structures between Water and Doors offering a quick route toward Ramp.
Water
The stream section between Tunnel and Ruins on the T side of the B lane.
Tunnel
The passage from T spawn into Water, used for B-side defaults and rushes.
T Lower
The lower region between Ramp and Heaven where B attacks are staged.
A Main
The archway lane from A Halls into the site — the primary A entrance.
Long
The final stretch of the Main lane opening onto A site.
Ramp
The wide slope from T Lower up to B site — the main B entrance and rush lane.
Contrôle du mid (11)
Elbow
The bent corridor connecting Split to mid — the T-side door into the middle of the map.
Mid
The central open area between Elbow, Doors, and the Snipers Nest — the rotation hub of the map.
Top Mid
The upper mid section by the stairs and tunnel toward the Snipers Nest doors.
Pit
The large recessed cubby opposite Tunnels in mid — cover for mid fights and lurks.
Tunnels
The passage connecting mid to Short — the route Ts take toward A after winning mid.
Xbox
The pair of crates beside Heaven in mid, used for cover and boosts.
Heaven
The elevated link between T Lower, Lamp Room, and mid on the B half of the map.
Lamp Room
The lantern-lit room connecting Heaven to Dark on the way toward B.
Dark
The dim passage between Lamp Room and House — a sneaky route onto B site.
Short
The alternative A entrance from mid via Tunnels — the split route on A executes.
House
The structure connecting Lamp Room/Dark to the B site — the second entrance on B splits.
Conseils tactiques
Ancient punishes dry peeks — take fights only behind utility.
Clear or smoke Donut on every A hit; a forgotten Donut player undoes the round.
As T, vary B tempo: fast Ramp rushes and late House splits break anchor rhythm.
As CT, molotov top of Ramp on timing — it deletes the fast B take.
Retakes with numbers favour CTs here; anchors should play time, not hero duels.
Stratégies courantes
Attaque côté T
Late A Execute
Hold a patient default, then hit A in the final 30 seconds: smoke CT Lane and Temple, molotov Plat, flash Main and Short, and enter from both doors at once.
Fast B Ramp Rush
Straight from spawn: smoke Back Halls, molotov the site anchor spots, flash up Ramp and plant behind Pillar. Beats slow defensive setups before utility is placed.
Mid Take → Short Split
Win Elbow/mid with a doors smoke, then split A through Short and Main simultaneously — the Short entrance flanks the Temple hold.
House + Ramp B Split
Send two through Heaven/Lamp Room into House while three take Ramp. The two-direction entry makes the Pillar anchor choose a death.
Défense côté CT
Utility Mid Lock
Molotov Elbow and smoke Tunnels on timing each round, holding mid with grenades instead of bodies while a roamer plays between Back Halls and A.
B Stall + Fast Rotate
The B pair spends everything to slow Ramp, while A-side players pre-rotate through Alley on first contact — Ancient rewards early rotation reads more than most maps.
Foire aux questions
- Quels sont les callouts clés sur Ancient ?
- Ancient compte 39 positions de callout majeures réparties entre le côté CT, le côté T et la zone du mid. Apprendre ces callouts est essentiel pour la communication d’équipe pendant les matchs compétitifs.
- Comment les CT devraient-ils défendre Ancient ?
- La défense CT sur Ancient devrait se concentrer sur le jeu d’angles serrés, la collecte d’informations précoce avec l’utility et les rotations en fonction des executes du côté T. Les setups de crossfire et une agressivité maîtrisée aident à garder le contrôle du site.
- Quelle est la meilleure stratégie côté T pour Ancient ?
- La meilleure approche côté T dépend de ton utility et de la coordination de l’équipe. Les setups default qui recueillent des informations avant de s’engager sur un site sont généralement les plus sûrs. Les executes rapides fonctionnent mieux quand tu as l’utility complète.
- Quelle est l’importance du contrôle du mid sur Ancient ?
- Le contrôle du mid est crucial sur Ancient, car il offre des options de rotation et le contrôle de la carte pour les deux camps. Les équipes qui contrôlent le mid obtiennent un avantage stratégique considérable dans la planification des rounds.
- Quelle utility devrais-je privilégier sur Ancient ?
- Privilégie les smokes pour les choke points clés, les flashes pour soutenir l’entrée et les molotovs pour nettoyer les positions courantes. L’utility complète sur Ancient coûte généralement entre 1000 et 1500 $ par joueur.
Voir les callouts de Ancient en anglais →