Anubis
A complex multi-level map with Egyptian temple architecture. Anubis rewards smart positioning, vertical gameplay, and coordinated utility usage, making it one of the more strategic active duty maps.
Map Radar
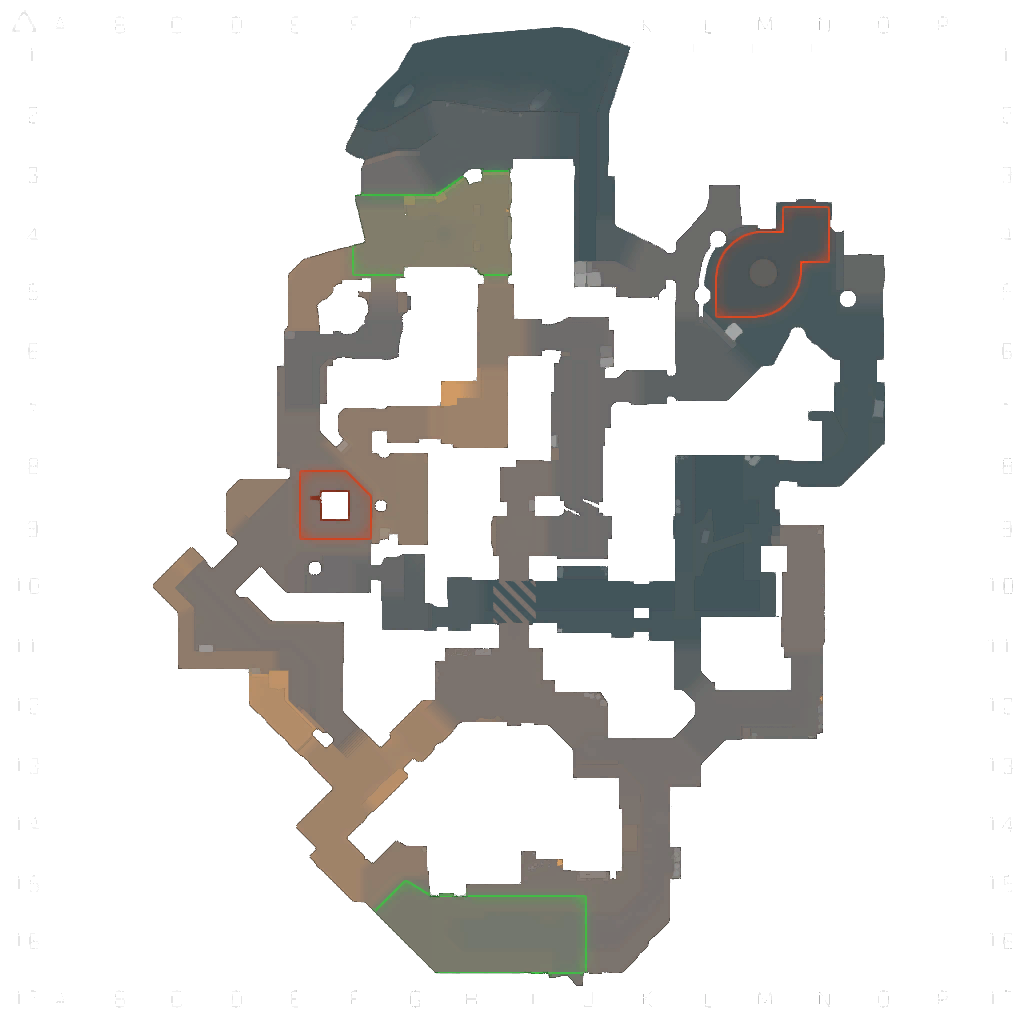
All Callouts (19 positions)
CT Side (10)
A Site
First bombsite with multiple elevation levels and cover positions.
A Main
Main corridor leading to A site. Primary defense position.
Ruins
Ruined structures near A site providing cover.
Palace
Palace structure overlooking A. Elevated defensive position.
CT Spawn
CT starting area. Central position for rotations.
B Site
Second bombsite at temple base. Complex layout with multiple holds.
Temple
Temple structure near B. Key position for B defense.
Boat
Boat area near B site. Cover for site defenders.
Heaven
Elevated position above B site. Strong height advantage.
Connector
Passage connecting A and B areas for CT rotations.
T Side (6)
T Spawn
T starting area with routes to both sites.
Canal
Water canal area. Alternative route toward B site.
Bridge
Bridge structure in T area. Elevated crossing position.
Alley
Narrow alley toward A site. Primary A approach path.
Water
Water feature area. Unique terrain near B approach.
Tunnel
Tunnel toward B site. Underground approach route.
Mid Control (3)
Mid
Central area connecting paths to both sites.
Street
Street area in mid. Open space for mid control fights.
Pillar
Pillar structures providing cover in mid area.
Tactical Tips
Master vertical play. Anubis features multiple levels that create unique combat scenarios.
Communication is essential. Complex layout requires precise callouts.
Utility defines rounds. Smokes and flashes control information and enable site takes.
Patience pays off. Slow executes often work better than rushed attacks.
Learn connector timings. CT rotations through connector are predictable and punishable.
Common Strategies
T-Side Attack
A Main Push
Coordinate through main with full utility. Smoke palace and ruins for safe entry.
B Canal Execute
Take canal control, push B through water and tunnel with molotovs for heaven.
Mid Split
Win mid control then split to weaker site based on CT positions.
CT-Side Defense
Temple Anchor
Play one player heaven, one temple. Use utility to delay pushes.
Frequently Asked Questions
- What are the key callouts on Anubis?
- Anubis has 19 major callout positions organized across CT side, T side, and mid areas. Learning these callouts is essential for team communication during competitive matches.
- How should CTs defend Anubis?
- CT defense on Anubis should focus on playing tight angles, gathering early information with utility, and rotating based on T-side executes. Crossfire setups and controlled aggression help maintain site control.
- What is the best T-side strategy for Anubis?
- The best T-side approach depends on your utility and team coordination. Default setups that gather information before committing to a site are generally safest. Fast executes work best when you have full utility.
- How important is mid control on Anubis?
- Mid control is crucial on Anubis as it provides rotation options and map control for both sides. Teams that control mid gain significant strategic advantage in round planning.
- What utility should I prioritize on Anubis?
- Prioritize smokes for key choke points, flashbangs for entry support, and molotovs for clearing common positions. Full utility on Anubis typically costs around $1000-1500 per player.