Mirage
A balanced map with strong mid control and two distinct bombsites. Mirage emphasizes tactical play with multiple rotations and tight angles that reward smarter positioning over raw firepower.
Map Radar
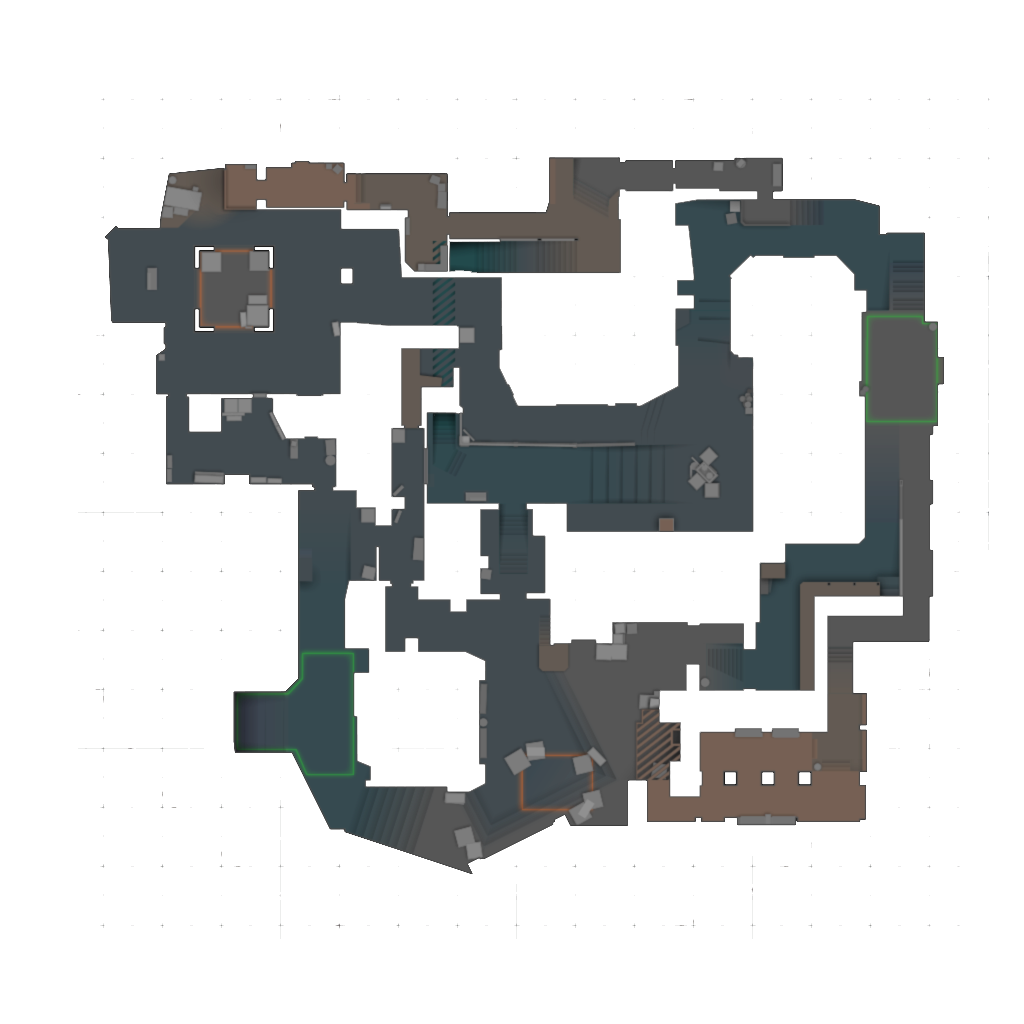
All Callouts (21 positions)
CT Side (10)
A Site
The main A bombsite area. Hold from ramp, stairs, or CT for defense.
A Ramp
Elevated ramp connecting mid to A site. Critical for CT control.
Palace
Structure above A ramp with rooms. Key for early picks or A stack.
Stairs
Stairs from CT base to A Ramp. Quick rotation to A site.
CT Spawn
CT starting area behind A site. Safe for regrouping.
Jungle
Plant area between A site and connector. Strong crossfire position.
B Site
Second bombsite behind apartments. Multiple defender positions.
B Apartments
Residential area leading to B. Strong for info and site control.
Short (Cat)
Narrow passage connecting mid to B short. High-traffic route.
Kitchen
Room behind B site providing cover and rotation options.
T Side (6)
T Spawn
T-side starting area. Safe zone for organizing executes.
Top Mid
T-side entry to mid area. Initial position for mid takes.
Underpass
Tunnel from T spawn toward A short. Sneaky rotate path.
T Ramp
Ramp from T spawn toward A site. Primary A execute route.
B Apps Entrance
Entry to B apartments from T side. Main B approach path.
Window
Window overlooking B short and mid. Aggressive info position.
Mid Control (5)
Mid
Central area of the map. Critical for gaining map control.
Connector
Passage connecting mid to A site. High-traffic position.
Catwalk
Elevated path above B site. Height advantage for mid players.
Mid Boxes
Box cover in mid area. Contested position during mid fights.
Ladder Room
Room with ladder between mid and short. Alternate route.
Tactical Tips
Control mid early to dictate the round. Winning mid gives T-side flexibility to hit A or B.
Communication matters more on Mirage. The many rotation paths demand precise callouts.
Play tight angles as CT. Many corners favor defenders when positioned correctly.
Utility usage is critical. Key smokes around A Ramp and mid control the pace of every round.
Practice your default positions. Crosshair placement and angle knowledge wins rounds.
Common Strategies
T-Side Attack
A Ramp Rush
Push A Ramp with smokes for stairs and CT, flashes for site. Fast plant with post-plant coverage from palace and ramp.
B Apartments Execute
Stack B apartments, smoke short and kitchen, flash site. Overwhelming numbers through apps.
Mid-to-A Split
Take mid control, split to A from connector and ramp simultaneously with coordinated utility.
CT-Side Defense
A Anchor Defense
Play one player stairs, one jungle. Use utility to delay ramp pushes and get info from palace.
Frequently Asked Questions
- What are the key callouts on Mirage?
- Mirage has 21 major callout positions organized across CT side, T side, and mid areas. Learning these callouts is essential for team communication during competitive matches.
- How should CTs defend Mirage?
- CT defense on Mirage should focus on playing tight angles, gathering early information with utility, and rotating based on T-side executes. Crossfire setups and controlled aggression help maintain site control.
- What is the best T-side strategy for Mirage?
- The best T-side approach depends on your utility and team coordination. Default setups that gather information before committing to a site are generally safest. Fast executes work best when you have full utility.
- How important is mid control on Mirage?
- Mid control is crucial on Mirage as it provides rotation options and map control for both sides. Teams that control mid gain significant strategic advantage in round planning.
- What utility should I prioritize on Mirage?
- Prioritize smokes for key choke points, flashbangs for entry support, and molotovs for clearing common positions. Full utility on Mirage typically costs around $1000-1500 per player.